

Image Slider With Dot Animation
Hello friends! Today we’re going to dive into using CSS to create a dot Image slider that has a ton of versatility. It’s going to be a very engaging project that will make a big impression.
Students, how would you arrange a collection of photographs on a webpage if I asked you to do so? Normally, you would arrange all of the photographs in a frame using the grid feature, but in this case, the image size would be minimal. That’s okay, but what if I suggest that the image be larger?
As a result, we have a technique for it that involves using a slider. Typically, we simply allow previewing of the top photographs and arrange one image over the other. However, we offer a variety of slider kinds, including dot and automated sliders.
Also, Read – Email Validation Using JavaScript
Hello, students!
Welcome to today’s random code blog post on our site. This blog post explains how to use HTML and CSS to create a dot image slider for CSS projects.
I hope this gave you an entirely fresh viewpoint on the project.
Let’s explore our project, the dot slider.
- Code by – AMKohn
- Project Download – Link Available Below
- Language used – HTML and CSS
- External link / Dependencies – No
- Responsive – Yes
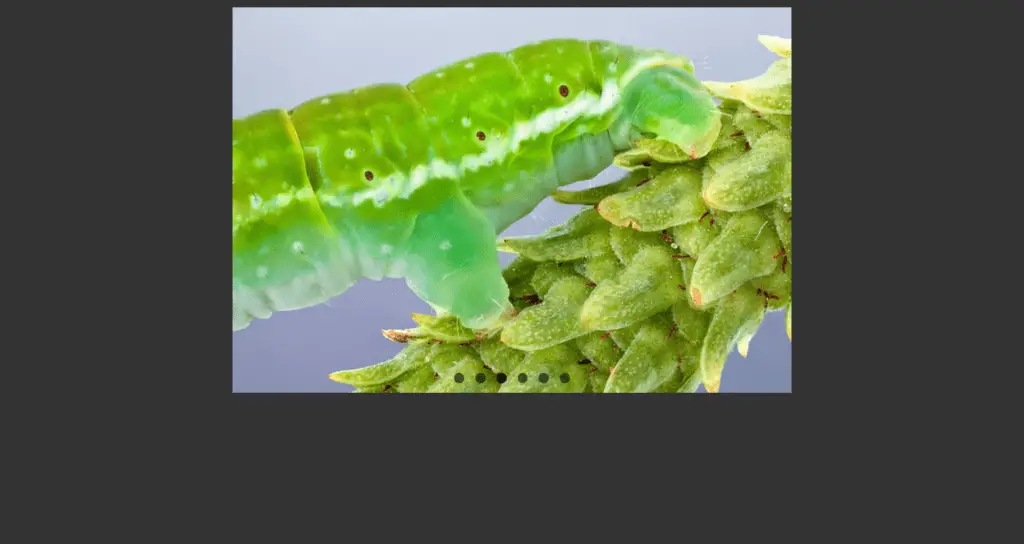
The way items are arranged within a container is seen in the slider dots CSS project preview.
- Our project’s area of expertise is as follows:
If you are able to view the attached image, you will notice that it is previewing. The image button has six dots, the first of which is somewhat lighter than the others because it is the first one that was imagined. - You will have to manually navigate this slider because it is manual. Then, both our image and the dot intensity will alter.
HTML SECTION Dot Image Slider -
The standard markup language for documents intended to be viewed in a web browser is called HTML, or hypertext markup language.
is the document type declaration that should be at the start of every HTML document.
The beginning of an HTML document is , and the end is .
The HTML document’s visual content is located between and . We place the website’s primary content inside the body tag.
Since the body of the HTML file is where we construct our browser, I won’t be building the HTML file structure from scratch here; instead, I’ll just paste the body.
The following sections make up our HTML section:
- All of the essential parts of the project are in a container that we own.
- The container contains four <li> tags with photos inside of it, as well as the previous and next two images.
- Lastly, we have dots for each of our available photographs. To assist us alter images using dots, we’re using radio input types to construct dots that, when we click on them, turn some of them active and make others inactive.
Now, open your IDE and run the code below, modifying only HTML and leaving out CSS styles.
<ul class="slides">
<input type="radio" name="radio-btn" id="img-1" checked />
<li class="slide-container">
<div class="slide">
<img decoding="async"
src="http://farm9.staticflickr.com/8072/8346734966_f9cd7d0941_z.jpg"
/>
</div>
<div class="nav">
<label for="img-6" class="prev">‹</label>
<label for="img-2" class="next">›</label>
</div>
</li>
<input type="radio" name="radio-btn" id="img-2" />
<li class="slide-container">
<div class="slide">
<img decoding="async"
src="http://farm9.staticflickr.com/8504/8365873811_d32571df3d_z.jpg"
/>
</div>
<div class="nav">
<label for="img-1" class="prev">‹</label>
<label for="img-3" class="next">›</label>
</div>
</li>
<input type="radio" name="radio-btn" id="img-3" />
<li class="slide-container">
<div class="slide">
<img decoding="async"
src="http://farm9.staticflickr.com/8068/8250438572_d1a5917072_z.jpg"
/>
</div>
<div class="nav">
<label for="img-2" class="prev">‹</label>
<label for="img-4" class="next">›</label>
</div>
</li>
<input type="radio" name="radio-btn" id="img-4" />
<li class="slide-container">
<div class="slide">
<img decoding="async"
src="http://farm9.staticflickr.com/8061/8237246833_54d8fa37f0_z.jpg"
/>
</div>
<div class="nav">
<label for="img-3" class="prev">‹</label>
<label for="img-5" class="next">›</label>
</div>
</li>
<input type="radio" name="radio-btn" id="img-5" />
<li class="slide-container">
<div class="slide">
<img decoding="async"
src="http://farm9.staticflickr.com/8055/8098750623_66292a35c0_z.jpg"
/>
</div>
<div class="nav">
<label for="img-4" class="prev">‹</label>
<label for="img-6" class="next">›</label>
</div>
</li>
<input type="radio" name="radio-btn" id="img-6" />
<li class="slide-container">
<div class="slide">
<img decoding="async"
src="http://farm9.staticflickr.com/8195/8098750703_797e102da2_z.jpg"
/>
</div>
<div class="nav">
<label for="img-5" class="prev">‹</label>
<label for="img-1" class="next">›</label>
</div>
</li>
<li class="nav-dots">
<label for="img-1" class="nav-dot" id="img-dot-1"></label>
<label for="img-2" class="nav-dot" id="img-dot-2"></label>
<label for="img-3" class="nav-dot" id="img-dot-3"></label>
<label for="img-4" class="nav-dot" id="img-dot-4"></label>
<label for="img-5" class="nav-dot" id="img-dot-5"></label>
<label for="img-6" class="nav-dot" id="img-dot-6"></label>
</li>
</ul>
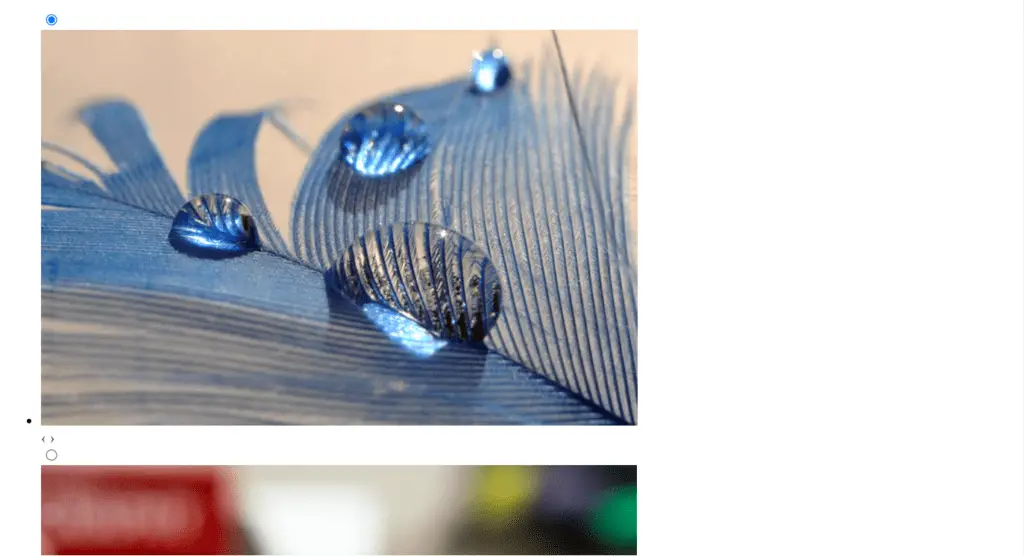
HTML Code Output -
Section of the Dot Image Slider CSS:
A style sheet language called Cascading Style Sheets is used to specify how a document written in a markup language, such as HTML or XML, should be presented. A key element of the World Wide Web, CSS is used in conjunction with HTML and JavaScript.
We will create our container and center it using CSS. Next, we will construct our image container so that all photos may be stacked on top of one another. Finally, we will put the previous and next buttons to hidden mode so that they will preview when the user hovers over them.
Lastly, we will create each button design, arrange them over the picture buttons, and apply a light color to the button itself.
You may get more insights by using the code below. Simply include it in your HTML file and watch for magic to occur.
					@import url(https://fonts.googleapis.com/css?family=Varela+Round);
html,
body {
    background: #333 url("https://codepen.io/images/classy_fabric.png");
}
.slides {
    padding: 0;
    width: 609px;
    height: 420px;
    display: block;
    margin: 0 auto;
    position: relative;
}
.slides * {
    user-select: none;
    -ms-user-select: none;
    -moz-user-select: none;
    -khtml-user-select: none;
    -webkit-user-select: none;
    -webkit-touch-callout: none;
}
.slides input {
    display: none;
}
.slide-container {
    display: block;
}
.slide {
    top: 0;
    opacity: 0;
    width: 609px;
    height: 420px;
    display: block;
    position: absolute;
    transform: scale(0);
    transition: all 0.7s ease-in-out;
}
.slide img {
    width: 100%;
    height: 100%;
}
.nav label {
    width: 200px;
    height: 100%;
    display: none;
    position: absolute;
    opacity: 0;
    z-index: 9;
    cursor: pointer;
    transition: opacity 0.2s;
    color: #FFF;
    font-size: 156pt;
    text-align: center;
    line-height: 380px;
    font-family: "Varela Round", sans-serif;
    background-color: rgba(255, 255, 255, 0.3);
    text-shadow: 0px 0px 15px rgb(119, 119, 119);
}
.slide:hover + .nav label {
    opacity: 0.5;
}
.nav label:hover {
    opacity: 1;
}
.nav .next {
    right: 0;
}
input:checked + .slide-container .slide {
    opacity: 1;
    transform: scale(1);
    transition: opacity 1s ease-in-out;
}
input:checked + .slide-container .nav label {
    display: block;
}
.nav-dots {
    width: 100%;
    bottom: 9px;
    height: 11px;
    display: block;
    position: absolute;
    text-align: center;
}
.nav-dots .nav-dot {
    top: -5px;
    width: 11px;
    height: 11px;
    margin: 0 4px;
    position: relative;
    border-radius: 100%;
    display: inline-block;
    background-color: rgba(0, 0, 0, 0.6);
}
.nav-dots .nav-dot:hover {
    cursor: pointer;
    background-color: rgba(0, 0, 0, 0.8);
}
input#img-1:checked ~ .nav-dots label#img-dot-1,
input#img-2:checked ~ .nav-dots label#img-dot-2,
input#img-3:checked ~ .nav-dots label#img-dot-3,
input#img-4:checked ~ .nav-dots label#img-dot-4,
input#img-5:checked ~ .nav-dots label#img-dot-5,
input#img-6:checked ~ .nav-dots label#img-dot-6 {
    background: rgba(0, 0, 0, 0.8);
}
Final Output -
See the Pen CSS image slider w/ next/prev btns & nav dots by Avi Kohn (@AMKohn) on CodePen.
We were able to learn how to create a dot image slider in HTML CSS projects by reading this blog post on the dot slider.
I’m searching for your reviews right now.
So, students, how was the blog?
Please see our blog sites at cssiseasy if you’d want a more in-depth blog similar to this one. You’ll learn something new every day here, so stay tuned!
I hope my explanation of this subject was clear and this blog post helped you learn something new. Feel free to remark if you had any difficulties, and if you like it, please express your gratitude in the comments section. It gives bloggers even more motivation to write new blogs.
Also, Read – Creating Math Game Using HTML, CSS & JavaScript
